
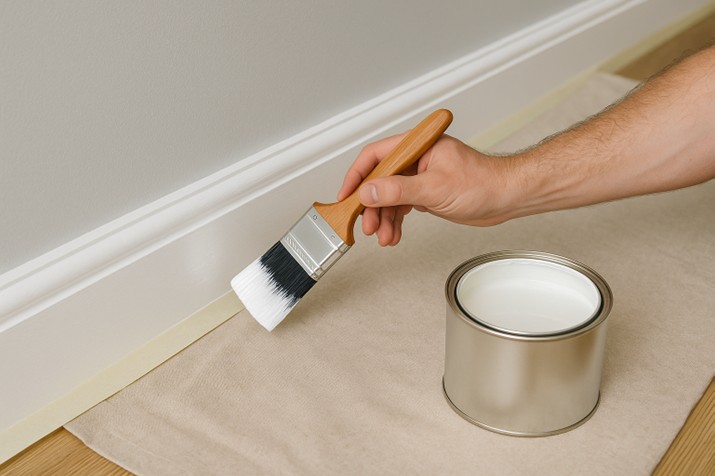
Gloss Painting Skirting Boards.
Professional gloss painting skirting boards transforms tired looking trim into polished features that enhance any room’s appearance. This traditional British decorating technique creates durable, wipeable surfaces that withstand daily wear from vacuum cleaners, furniture scuffs, and general household activity. Moreover, the reflective quality of gloss paint brightens spaces whilst providing long-lasting protection for your skirting boards.
Professional results depend entirely on proper preparation, quality materials, and correct application techniques. Furthermore, choosing between oil-based and water-based gloss affects both the working time and final appearance. What specific challenges might you encounter when attempting to achieve that perfect, streak-free finish?
Key Takeaways
- Proper surface preparation including cleaning, sanding, and filling forms the foundation for successful gloss painting skirting boards
- Material selection between oil-based and water-based gloss affects drying times, durability, and application requirements
- Professional application techniques including correct brush loading and maintaining wet edges prevent common finishing problems
- Environmental factors such as temperature, humidity, and ventilation significantly influence paint performance and drying schedules
- Multiple coat systems with appropriate sanding between applications achieve the smooth, durable finish expected from quality work
- Regular maintenance and proper cleaning preserve the appearance and extend the lifespan of professionally applied gloss finishes
Essential Preparation Techniques
Surface Cleaning Methods
Thorough cleaning forms the foundation of successful gloss painting skirting boards projects. Initially, remove all furniture and floor coverings, then apply a mild sugar soap solution using a clean cloth to eliminate grease, dirt, and accumulated grime. Subsequently, rinse the surface with fresh water and allow complete drying before proceeding to the next stage.
Sanding and Repair Work
Proper sanding creates the ideal surface texture for paint adhesion when gloss painting skirting boards. Additionally, use 120-grit sandpaper for initial preparation, followed by 180-240 grit for smoothing, always working along the wood grain direction. Meanwhile, fill any dents with quality wood filler and seal gaps between skirting and walls using decorator’s caulk.
Material Selection and Tools
Paint Types and Primers
Oil-based gloss provides traditional durability and hardness, whilst water-based alternatives offer faster drying times and reduced odours. Nevertheless, both require appropriate primers: wood primer for bare timber and MDF primer/sealer for manufactured boards. Consequently, matching your primer type to your chosen gloss ensures optimal adhesion and longevity.
Professional Equipment Requirements
Quality tools significantly impact the final appearance when gloss painting skirting boards effectively. Therefore, invest in angled sash brushes (25-38mm), various grades of sandpaper, low-tack masking tape, and protective dust sheets. Furthermore, working from a paint kettle rather than the original tin prevents contamination and maintains paint consistency throughout the project.
Application Techniques for Perfect Results
Masking and Edge Protection
Precise masking protects adjacent surfaces whilst creating clean, professional lines during gloss painting skirting boards. However, press tape edges firmly to prevent paint bleeding, particularly where skirting meets carpet or hardwood flooring. Additionally, remove masking tape whilst paint remains slightly tacky to avoid peeling the new finish.
Brush Loading and Stroke Techniques
Correct brush loading prevents drips and ensures even coverage when gloss painting skirting boards professionally. Specifically, dip only the lower third of bristles into paint, then tap excess against the kettle edge rather than wiping. Subsequently, apply paint using smooth, long strokes that follow the wood grain whilst maintaining a wet edge throughout each section.
Timing and Environmental Factors
Drying Time Considerations
Understanding drying schedules prevents common mistakes during gloss painting skirting boards projects in British conditions. Oil-based gloss requires 4-6 hours before becoming touch-dry and 16-24 hours between coats, whilst water-based alternatives dry within 1-2 hours and accept recoating after 4-6 hours. Nevertheless, full curing takes several days regardless of paint type.
Seasonal and Climate Effects
British weather significantly influences paint performance, particularly during autumn and winter months when humidity levels rise. Therefore, ensure adequate ventilation without creating strong draughts that deposit dust on wet surfaces. Moreover, heating systems can accelerate drying but may cause temperature-related application problems if rooms become too warm.
Advanced Professional Methods
Multiple Coat Systems
Professional standards typically require two coats when gloss painting skirting boards, though darker colours over light bases may need additional coverage. Between coats, lightly sand with 240-grit paper to remove imperfections and create adhesion for subsequent layers. Furthermore, remove all sanding dust using tack cloths before applying each new coat.
Troubleshooting Common Issues
Gloss paint readily reveals brush marks, drips, and surface imperfections due to its reflective properties. Therefore, work systematically from one end to the other, watching carefully for runs around moulded profiles and corners. Additionally, avoid overworking areas as gloss paint self-levels naturally during the drying process.
Quality Control and Finishing
Inspection and Touch-ups
Careful inspection under various lighting conditions reveals areas requiring attention after gloss painting skirting boards. Use angled work lights positioned near floor level to highlight brush marks or missed spots that normal room lighting might conceal. Subsequently, address any imperfections with light sanding and targeted touch-ups using the same application techniques.
Long-term Maintenance Considerations
Properly applied gloss finishes provide years of service with minimal maintenance requirements. However, regular cleaning with mild detergent solutions preserves the appearance and protects the underlying timber from moisture damage. Eventually, light scuffing may occur, but localised touch-ups can restore appearance without complete repainting.
Conclusion
Gloss painting skirting boards elevates any interior whilst providing practical protection against daily wear and damage. Professional results depend on meticulous preparation, appropriate material selection, and careful application techniques that respect the unique properties of gloss paint. Therefore, patience during each stage produces superior outcomes compared to rushed approaches.
Success with gloss painting skirting boards comes from understanding how environmental conditions, material compatibility, and application timing work together. Nevertheless, when challenges arise or time constraints prevent proper preparation, consulting experienced professionals like Woking Painter and Decorator ensures consistently excellent results that enhance property value and appearance for years ahead.
Make an Enquiry
Frequently Asked Questions
How long should I wait between applying primer and gloss paint to skirting boards?
The waiting time between primer and gloss depends on the primer type and environmental conditions in your home. Oil-based primers typically require 16-24 hours before applying gloss painting skirting boards, whilst water-based primers often dry sufficiently within 4-6 hours. However, temperature and humidity levels significantly affect these timescales, particularly during British winter months.
Always check that primer feels completely dry to touch and shows no tackiness before proceeding. Moreover, lightly sanding the primer with 240-grit paper creates better adhesion for the final gloss coat, though this step requires the surface to be fully cured.
What’s the difference between oil-based and water-based gloss for skirting board painting?
Oil-based gloss provides superior durability and creates the traditional high-shine finish associated with classic British decorating. Nevertheless, it requires longer drying times, produces stronger odours during application, and needs white spirit for brush cleaning. Additionally, oil-based products may yellow slightly over time, particularly in rooms with limited natural light.
Water-based gloss dries much faster, produces minimal odour, and maintains colour stability better than oil alternatives when gloss painting skirting boards. Furthermore, brushes clean easily with soap and water, making the entire process more convenient. However, water-based products may require additional coats to achieve the same depth of finish as oil-based equivalents.
Can I paint over existing gloss paint without sanding the skirting boards first?
Painting over existing gloss without proper preparation typically results in poor adhesion and premature failure. Gloss surfaces are inherently smooth and non-porous, preventing new paint from bonding effectively when gloss painting skirting boards. Therefore, light sanding with 120-grit paper creates the necessary surface texture for proper adhesion.
However, thorough cleaning with sugar soap and applying a high-quality bonding primer can sometimes eliminate the need for extensive sanding on sound existing finishes. Nevertheless, any areas showing wear, chips, or peeling require complete preparation including scraping, sanding, and filling before successful repainting can occur.
Why do I get brush marks when applying gloss paint to my skirting boards?
Brush marks typically result from incorrect application techniques or using poor-quality brushes during gloss painting skirting boards projects. Specifically, overloading the brush, working too slowly, or attempting to cover excessive areas before maintaining the wet edge causes visible streaking. Additionally, cheap brushes shed bristles and create uneven paint distribution that shows clearly in glossy finishes.
Professional results require systematic working methods, quality angled brushes, and understanding that gloss paint self-levels during drying. Therefore, avoid overworking areas once paint begins setting, and ensure adequate lighting during application to spot potential problems immediately. Moreover, maintaining consistent room temperature prevents the paint from becoming too thick or thin during application.
How many coats of gloss paint do skirting boards typically need for professional results?
Most gloss painting skirting boards projects require two coats over properly prepared and primed surfaces to achieve professional opacity and durability. However, dramatic colour changes, such as applying white gloss over dark existing paint, may necessitate additional coats for complete coverage. Furthermore, the quality of primer significantly affects the number of finish coats required.
Light sanding between coats with 240-grit paper removes imperfections and improves adhesion for subsequent applications. Additionally, high-quality gloss paints often provide better coverage than budget alternatives, potentially reducing the total number of coats needed. Nevertheless, rushing the process by applying thick coats typically creates more problems than applying proper thin coats with adequate drying time between applications.